Users and groups
Users
A user represents the identity of a person, and is used for group and role management. To view or manage users, open the Users View (Sidebar > Browse () > Platform > Users).
A user is an entity. This means a common set of operations apply to it, like getting its URL or using it as a parameter in the audit record. Like with other entities, you can search for users using its parameters.
User entity parameters
Adding users
To create a new user:
-
On the Sidebar, click Browse () > Platform > Users.
-
Click the NEW button and select the option you want:
-
New User...: Select this option to create a user without sending an invitation to sign up. This option is typically used to create the initial admin users who can later invite other users to sign up via URL or email invitation, or add users using services like OAuth or OpenID.
Instructions
- In the New User dialog, enter the user's name, email, and login.
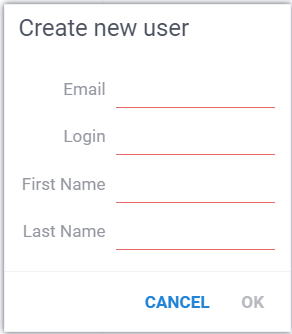
- Click OK to create a user.
-
New Service User...: Choose this option to create an account for scripts and integrations. To sign in as a service user, give it a key pair (see Keypair authentication).
Instructions
- In the New Service User dialog, enter the login for the service user.

- Click OK to create the service user.
-
Invite a Friend...: Select this option to email an invitation to sign up to the platform.
Instructions
- In the Invite User dialog, enter the email address of the user you want to invite.

- Click OK to send the invitation.
-
To manage users, in the Users View, find the user you want, and right-click it to access available actions.
To create users and service users, you need the Create User global permission. To invite users, you need the Invite User permission.
Disabling accounts
To disable a user account, go to Browse > Platform > Users, right-click the user, and select Disable.... You need the Edit User global permission, and you can't disable your own account. The disabled user can't log in, all their active sessions end immediately, and they won't count toward the license.
Nothing is deleted: the assets the user owns stay available and shared the same way. The Disable user dialog lists them under Owned entities, so you can move them to a space, one by one or all at once with Move all to. Turn on Admin mode first: otherwise, the dialog warns Admin mode is off., lists only the entities shared with you, and can't move them. You can also share the assets with others later.
To restore access, right-click the user and select Enable. The user signs in with their existing credentials.
Currently, there is no way to permanently delete a user. We are planning to implement it in the future versions.
Bulk and scripted management
For scripted user lifecycle management — bulk imports, syncing with an external
identity source such as Active Directory, or seeding a fresh server — use the
grok s CLI. It exposes users save,
users block, groups save, groups add-members, and groups list-members
as idempotent shell commands that talk to the platform's public REST API.
Groups
A group is a named collection of users that share permissions. To view or manage groups, open the Groups View (Sidebar > Browse () > Platform > Groups).
A group is an entity, which means a common set of operations apply to it, like getting its URL or using it as a parameter in the audit record. Like with other entities, you can search for groups using the group's parameters.
Group entity parameters
You can use these fields to filter groups with smart search:
| Field | Description |
|---|---|
| ID | |
| name | |
| isPersonal | |
| parents | |
| members | |
| createdOn | |
| updatedOn | |
| user | User object: User, if group is personal |
Group structure
Every user automatically forms their own group, but groups can also consist of multiple users and other groups. This grouping mechanism lets you create hierarchies that mirror your organization’s structure or security requirements. For example:
- Group 1 has members User 1 and Group 2
- Group 2 has members User 2 and User 3
- Because Group 2 is a member of Group 1, User 2 and User 3 are also members of Group 1.

Note: Child groups inherit permissions of the parent group.
Regardless of group membership, any user can do the following actions with respect to a group:
- Chat with group members (right-click > Chat)
- Request membership (right-click > Request membership)
- Share entities
Group types
Datagrok automatically creates these groups upon deployment:
| Name | Kind | Purpose |
|---|---|---|
| All users | Group | Contains every user and group. Its permissions apply to everyone |
| Administrators | Role | Holds all global permissions that All users doesn't have |
| Admin | Personal group of the admin user | Member of Administrators. The admin user and password come from the deployment script |
| System | Internal service account | Used by the platform itself. Member of Administrators. Don't modify |
Immediately after the deployment, sign in as the admin user to configure the
instance. To give other people administrator rights, add them, or a group they
belong to, to the Administrators role.
Exercise caution when modifying the Administrators role. Removing its permissions or members without a functional replacement may result in a loss of all administrative capabilities on the platform.
Global permissions control administrative operations such as creating users, editing groups, and changing server settings. For the full list and the defaults, see Global permissions. To edit them, go to Settings > Global Permissions, or select a group or role and, on the Context Panel, expand Global Permissions and click MANAGE.
Roles
A role is a group that holds permissions rather than people. Assign a role to groups, and every member of those groups inherits what the role grants. To learn when to use a group and when to use a role, see Groups and roles.
To view or manage roles, go to Sidebar > Browse () > Platform > Roles.
- Create a role: On the Top Menu, click the NEW ROLE... button.
- Grant permissions to a role: Select the role and, on the Context Panel, expand Global Permissions and click MANAGE. Share entities with the role like with any group.
- Assign a role to a group: Right-click the group, select Properties..., and open the Roles tab.
- See who has a role: The role's Assigned to tab (in the Properties... dialog) and Assigned to pane (on the Context Panel) list the groups and users that have it.
Group synchronization from an identity provider never matches roles, so a group created in the identity provider can't grant itself a role.
Managing groups
The following actions are available from the group's context menu (available on right-click):
- Properties...: Opens the group editor with these tabs:
- Details: The group's name and description
- Members: Add or remove members, and mark group admins
- Roles: Assign roles to the group
- Belongs to: Add the group to other groups or remove it from them
- Request membership: Ask the group admins to add you
- Chat: Chat with group members
- Delete: Delete a group
You can also manage members from the Context Panel: expand Members and click MANAGE.
Creating a group
Any user can create a group. To create a group:
- Go to Sidebar > Browse () > Platform > Groups. A NEW GROUP... button appears on the Top Menu.
- On the Top Menu, click the NEW GROUP... button to open the Create New Group dialog.
- In the dialog, fill out the group's name and, optionally, description.
- Click OK.
Within a group, one or more members can be assigned as group admins. Group admins can:
- add and remove members
- approve and deny membership requests
- edit group name
If user is the only admin in group, they can't leave the group or revoke their admin privileges.
Adding users to a group
To add users to a group, you have two options:
- Manually add members (right-click the group, select Properties..., and open the Members tab)
- Invite users to sign up via URL
If you add a member by an email address that doesn't belong to any user yet, Datagrok creates a new user with that email.
Inviting users via URL
Group administrators can invite users to join a particular group via URL. This feature is useful for onboarding multiple users simultaneously or for tracking signups after specific events such as webinars or collaborative projects.
To create an invitation link:
-
Go to Sidebar > Browse () > Platform > Groups. A Groups View opens.
-
In the Groups View, right-click the group and select Properties... A dialog opens.
-
Click the Gear () icon and enter or generate a password in the Password field. By default, the dialog displays an autogenerated password.
-
Copy the password and use it to create an invitation link as follows:
<instance URL>?groupPassword=<password>For example:
public.datagrok.ai/?groupPassword=<password> -
Copy the URL and distribute to recipients.
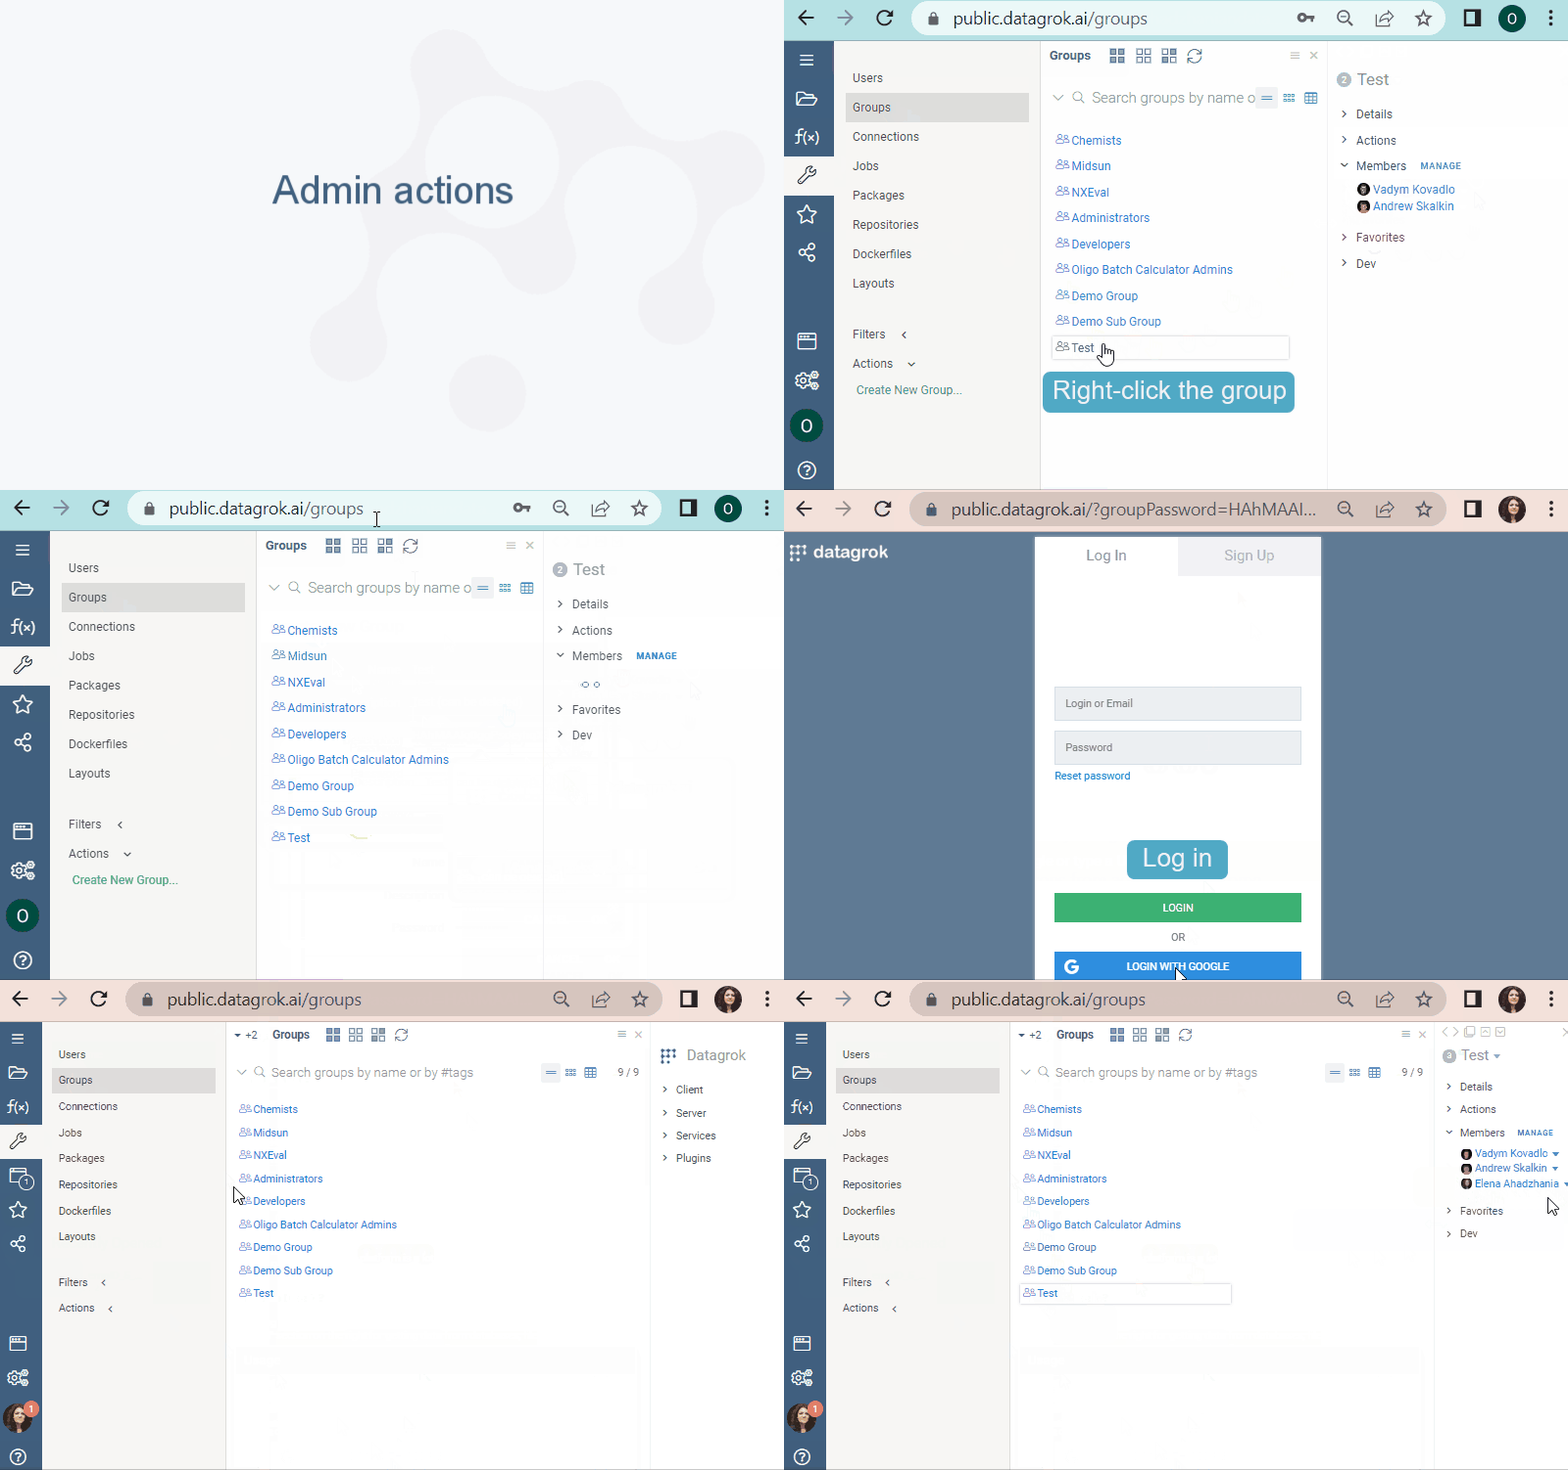
Only the group administrator can create an invitation link.